Mastering Nuxt i18n: From Setup to Translation Automation

Internationalizing your Nuxt app (or implementing i18n) is an essential step in making your application accessible to a global audience.
With tools like the Nuxt i18n module, you can seamlessly integrate multilingual support and provide a localized experience for your users. However, managing translations for multiple languages can quickly become a complex task, especially as your app grows.
This guide will walk you through the process of setting up i18n in a Nuxt app from scratch, and introduce you to Polygot, a powerful tool to automate localization and streamline your workflow.
Table of contents
All the code for this guide is available in this github repository. Feel free to clone it for use as a template or to save time!
Creating a new Nuxt project
For this guide, we're going to start with a new Nuxt project. Of course, if you have already created your own project, you can adapt all the steps in this guide to your existing application.
If you don't yet have an application, let's create one together.
npx nuxi@latest init my-app
Let's launch this application to confirm that so far so good.
cd nuxt-i18n
npm run dev
Open your browser at http://localhost:3000 and, if everything is indeed good, you should see a web page that looks like this:
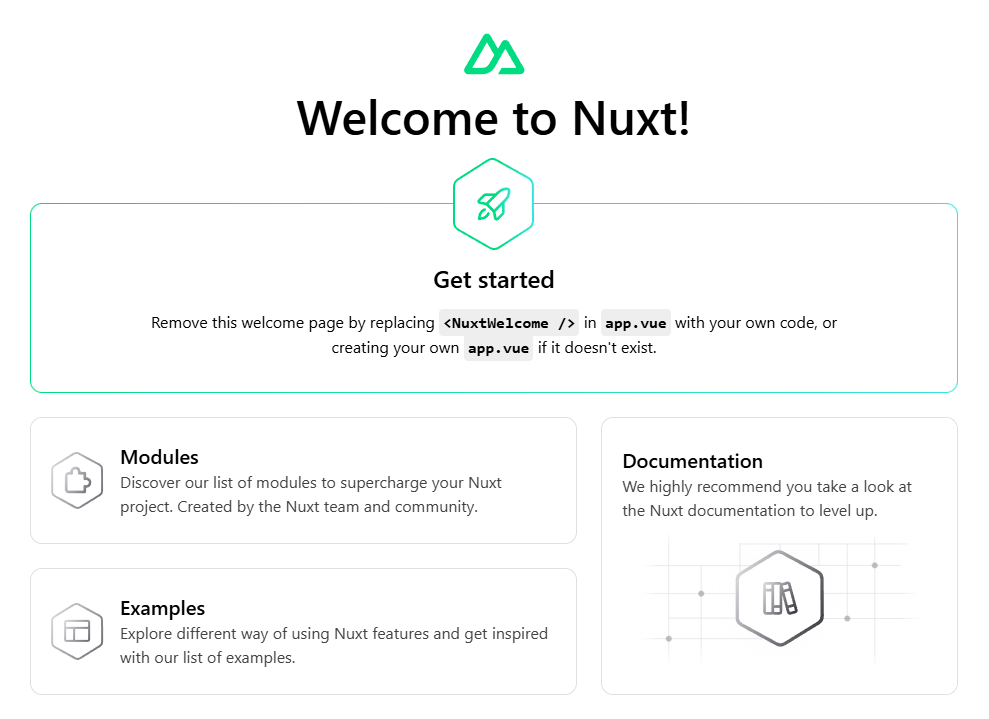
This initial application isn't bad, but it won't allow us to implement our internationalisation system as is. The view displayed is actually generated from components that we don't have access to. So it's impossible to translate them.
Let's create our own interface, with 2 separate pages.
<template>
  <h1>
    Home
  </h1>

  <p>
    Welcome to our new Nuxt app!
  </p>
</template>
<template>
  <h1>
    About us
  </h1>

  <p>
    Here is some content about our company...
  </p>
</template>
<template>
  <NuxtPage />
</template>
I'll give you that, our application is perhaps a little less sexy than the initial one... 😐 But at least we have a handle on everything. 🙂
By the way, let's add navigation so that you can move from one page to another.
<template>
  <header>
    <nav>
      <ul>
        <li v-for="page in pages" :key="page.to">
          <NuxtLink :to="page.to" active-class="current-page">{{ page.name }}</NuxtLink>
        </li>
      </ul>
    </nav>
  </header>
</template>

<script setup lang="ts">
const pages = ref([
  { name: 'Home', to: '/' },
  { name: 'About us', to: '/about' }
])
</script>

<style scoped lang="css">
ul {
  list-style-type: none;
  display: flex;
  gap: 10px;
  padding: 0;
}

a {
  text-decoration: none;
  color: green;
}

a.current-page {
  text-decoration: underline;
}
</style>
<template>
  <Nav />
  <NuxtPage />
</template>
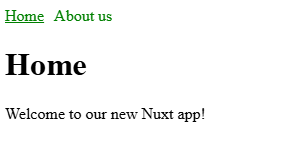
And there we are! We now have a fully functional (although vary basic) website, with multiple pages and a navigation.

Internationalization
Nuxt is a very powerful tool for Vue.js developers. In addition to the basic functions and mechanisms, its ecosystem is very rich, thanks to the modules developed by the Nuxt team or by members of the community.
So when it comes to i18n, obviously a module has already been created for us. And that's going to save us a lot of time!
Let's install the Nuxt i18n module.
npx nuxi@latest module add @nuxtjs/i18n@next
Let's check that the module hs been added to our Nuxt config file real quick.
export default defineNuxtConfig({
  // ...
  modules: ['@nuxtjs/i18n'],
  // ...
})
This module offers 2 integration options:
- use the Vue i18n plugin (which is the "engine" behind this Nuxt module), with the module serving only as a gateway
- use the mechanisms introduced by this module, which complement the basic Vue plugin
In this guide, we will opt for the second option. In my opinion, the integration will be smoother, and we'll be able to take advantage of Nuxt's mechanisms more easily.
If you are interested in the first option, you can check our guide on the Vue i18n plugin.
Without further ado, let's start integrating this new module to make our application localization-ready.
The first step is to create JSON files, in which we will store our app's text content. Let's create 1 file per locale, in a new i18n/locales directory.
{
  "home": {
    "title": "Home",
    "welcome": "Welcome to our new Nuxt app!"
  },
  "about": {
    "title": "About us",
    "content": "Here is some content about our company..."
  }
}
{
  "home": {
    "title": "Accueil",
    "welcome": "Bienvenue sur notre nouvelle application Nuxt !"
  },
  "about": {
    "title": "À propos",
    "content": "Voici du contenu sur notre entreprise..."
  }
}
As yo ucan see here, we can find in the English file (en.json) all the text that we "hard coded" previsouly. In the French one (fr.json), we can find the same keys, with the same content, translated. Very simple, isn't it?
We now have to tell Nuxt that those files are going to serve as locale message sources. By default, the Nuxt i18n module searches for files under the i18n/locales directory, so no need to give the full path here.
export default defineNuxtConfig({
  // ...
  i18n: {
    defaultLocale: 'en',
    locales: [
      {
        code: 'en',
        file: 'en.json'
      },
      {
        code: 'fr',
        file: 'fr.json'
      },
    ]
  }
})
Now that our messages are ready, we have to use them, right? Let's edit our pages and components to introduce the use of the t function, which returns a message corresponding to a given key, in the currently selected locale.
<template>
  <h1>
    {{ $t('home.title') }}
  </h1>

  <p>
    {{ $t('home.welcome') }}
  </p>
</template>
<template>
  <h1>
    {{ $t('about.title') }}
  </h1>

  <p>
    {{ $t('about.content') }}
  </p>
</template>
// ...

<script setup lang="ts">
const { t } = useI18n()

const pages = ref([
  { name: t('home.title'), to: '/' },
  { name: t('about.title'), to: '/about' }
])
</script>
You might notice hydration errors in your browser's console at this point. If you do, this is probably because you need to restart your dev server.
You can now display our app both in English and in French, by navigating to http://localhost:3000 or http://localhost:3000/fr.
However, when playing with our French application and changing pages, you will most certainly notice that we have a small problem to fix: navigation links do not retain our locale parameter!
The Nuxt i18n module of course has a very easy solution for that: the NuxtLinkLocale component. By replacing occurrences of NuxtLink with this component, our links should be fixed.
<template>
    <header>
    <nav>
      <ul>
        <li v-for="page in pages" :key="page.to">
          <NuxtLinkLocale :to="page.to" active-class="current-page">{{ page.name }}</NuxtLinkLocale>
        </li>
      </ul>
    </nav>
  </header>
</template>

<!-- ... -->
Let's do a little check here. Let's open the French version of our app (http://localhost:3000/fr):
- the app is correctly displayed in French
- the "Accueil" (Home) link is active, as expected
- we can navigate to the "A propos" (About us) page without changing the locale
Locale switcher
Until now, every time we wanted to access a version of our app in a particular language, we had to edit the URL manually. It works, but:
- it's not very practical
- neophytes will never know how to change the language
- you don't know which languages are available
That's where the locale selector comes in!
But first, we need to make some very simple changes to our nuxt config file: we need to add a name to each locale. These names will be useful in our locale switcher. All of them must be written in their own language, so that a user can understand the name of the language he is looking for.
export default defineNuxtConfig({
  // ...
  i18n: {
    // ...
    locales: [
      {
        code: 'en',
        file: 'en.json',
        name: 'English'
      },
      {
        code: 'fr',
        file: 'fr.json',
        name: 'Français'
      },
    ]
  }
})
Let's now create a new component for the locale switcher.
<template>
  <div>
    <select v-model="currentLocale">
      <option v-for="locale in locales" :key="`locale-${locale}`" :value="locale.code">{{ locale.name }}</option>
    </select>
  </div>
</template>

<script setup>
const { locale: currentLocale, locales, setLocale } = useI18n()

watch(currentLocale, () => {
  setLocale(currentLocale.value)
})
</script>
This new component is relatively basic:
- it displays a select button, whose selected value is the current locale according to our i18n module, and whose options are all the locales defined in our module configuration
- it observes changes to the locale via the watcher, to force the URL to be modified according to the new language selected
Finally, let's add this component to our app.
<template>
  <Nav />
  <NuxtPage />
  <LocaleSwitcher />
</template>
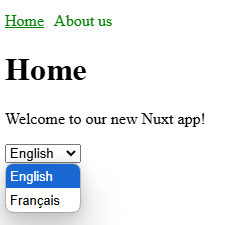
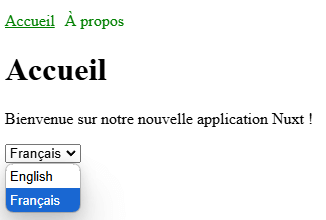
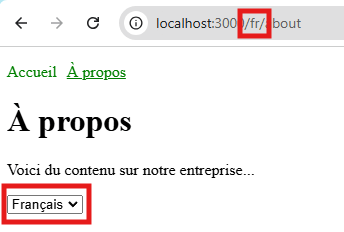
As explained above, and as we have seen so far, the URL of our pages takes the language into account, except for English, which is configured as the default language. You are free to change this behaviour via the strategy option in the Nuxt i18n module configuration.
For the rest of this guide, we'll keep this default mode, because I believe it's the most common and the simplest.
Lazy loading messages
We now have a fully functional multilingual website. But we still have a few points to address before we have a fully satisfactory internationalization system.
A key issue when creating an application is its performance. And so far, we can't say that our internationalization system is performing very well. We don't realise this because our application is very small, with very little functionality, very little text content, and in very few languages. But if you take a closer look, you'll see that, as things stand, we're loading all our messages in all the locales we've configured!
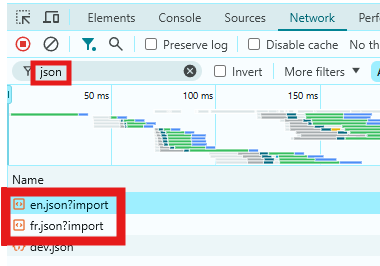
We need to correct this if we don't want our users to load all our messages, which would represent a lot of data (and therefore a longer loading time) on an application with more functions and more languages.
It's actually very simple to correct, given the system we've had in place up to now.
First, let's tell Nuxt that we want our locale messages to be loaded on demand (known as "lazy loading").
export default defineNuxtConfig({
  // ...
  i18n: {
    lazy: true,
    // ...
  }
})
Now, let's edit our LocaleSwitcher component.
<!-- ... -->

<script setup>
const { locale, locales, setLocale, loadLocaleMessages } = useI18n()

const currentLocale = ref(locale.value)

watch(currentLocale, async () => {
  await loadLocaleMessages(currentLocale.value)
  setLocale(currentLocale.value)
})
</script>
Now, as you can see, when the current locale is changed, we dynamically load the associated messages. The module takes care of loading the corresponding JSON file and add the messages. If the file has already been loaded, the loading is ignored, so don't worry about it.
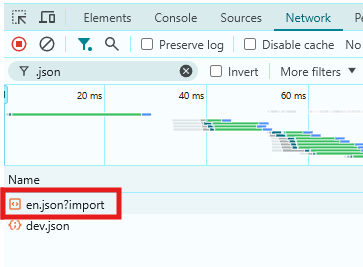
The default locale will be loaded no matter which locale is selected. This is because our missing messages will fallback to the default ones, so they need to be loaded.
We can optionally load only the current locale (thus, not the default one) by removing the defaultLocale option, but in this case the URL of all our pages will have to contain a locale parameter.
Automatic locale detection
Since Nuxt i18n module takes care of a lot of things for us (which makes our job a lot easier), we may not be happy with certain behaviours. One of these is the automatic language selection.
It can be useful to know how to modify these behaviours to adapt the module to our needs and preferences as app builders.
Browser language
By default, the browser's language is used as the selected language, if our app offers it.
While this might be useful for most scenarios, you may want to let the choice to your users to change the language or not. Displaying a notification telling the users that the app is availble is French (for instance) is a widespread practice. While my browser is in French, I sometimes prefer to visit the english version of a website because it may contain more information (Wikipedia articles for example).
If you would like to, you can disable this feature completely.
export default defineNuxtConfig({
  // ...
  i18n: {
    // ...
    detectBrowserLanguage: false,
    // ...
  }
})
User's preference
Let's remove the detectBrowserLanguage: false option introduced in the previous point.
We can observe a behaviour which, once again, can be useful but which can also be ennoying, depending on the context.
- Move to the French version of our app. The current path should contain the
/frparameter. - Move to the english version by deleting the
/frparameter - We are redirected to the French version :thinking_face:
Isn't it ennoying? I want to go to the English version by directly editing the URL (because I don't find the locale selector or any other reason) but I constantly get redirected to the French one. It's almost like the english version doesn't exist and that the French one is the default.
Obviously, I'm exaggerating a bit here, but that's what some users might think.
So, what's going on here? Let's inspect the app's cookies:

Nuxt i18n module by default uses a cookie to store the user's language preference. Thanks to this cookie, it knows which language I selected previsouly, so that when I go to the app (let's say my-app.com) it redirects me to my prefered language (my-app.com/fr).
You can disable this behavior by disabling the use of cookie.
export default defineNuxtConfig({
  // ...
  i18n: {
    // ...
    detectBrowserLanguage: {
      useCookie: false
    },
    // ...
  }
})
Now, no matter what language I chose previously, I will be able to display my application in the language of my choice by changing the route directly.
Depending on your preference, as an app or website builder, it's up to you to choose what will work best for your users.
Localization automation
We've done it: our internationalisation system is fully integrated into our application! ✨
We can now expand its functionalities, and above all localize it in many languages so that as many users as possible can use it, all over the world! 🚀
Well, it does sound interesting, but the reality is that it's not that simple.
Although we've so far managed to handle both English and French, you'll soon realize that managing more than 2 or 3 languages is no easy task, especially for an application or website with lots of content.
As a developer, it's best to spend your time building and thinking about the application itself, and not on translation, which is very time-consuming and a bit risky when you don't speak all the languages.
It's time to set up a localization automation system that integrates easily and seamlessly into your workflow.
In this final step of our guide to Nuxt application internationalization, we'll integrate Polygot, an automated localization solution, in just a few minutes.
- Create a free Polygot account
- Install the CLI
npm install -g @polygothq/cli - Create a new Polygot project, with some new target languages (Italian, Spanish, or whichever you prefer)
- In our app root directory, initialize the Polygot project. Set
i18n/locales/en.jsonas the source file, andi18n/locales/%lang%.%ext%as translations target patternpolygot init - Push our existing messages
polygot push sources polygot push translations -l fr - Synchronize to generate and pull the new translations
polygot synchronize - Add the missing target languages in
nuxt.config.tsnuxt.config.tsexport default defineNuxtConfig({ // ... i18n: { // ... locales: [ // ... { code: 'it', file: 'it.json', name: 'Italiano' }, { code: 'es', file: 'es.json', name: 'Español' }, ] } })
Very good, and then? Well, nothing at all, we're done!
We can now add new features, modify our text content, etc., with English only in mind. We don't have to modify JSON files for other locales. When we want to update all the locales (before a build, for example), all we have to do is run the polygot synchronize command from our app's root directory, and that's it!
This will save us hours of labor.
Conclusion
Congratulations! You've just taken your Nuxt app to the next level with a fully functional internationalization setup. With i18n in place, your app is ready to cater to users in multiple languages, enhancing accessibility and user satisfaction.
But why stop here? Polygot makes it effortless to manage translations and keep them synchronized as your app evolves, saving you time and ensuring consistency across all locales.
Take the next step and experience the simplicity of automated localization. Create a free Polygot account today and see how easy it is to scale your Nuxt app for a global audience!


