Vue i18n: The Complete Guide to Localizing Vue.js Apps

Building a Vue.js application that reaches users worldwide is an exciting challenge. Localization, or the process of adapting your app to different languages and cultures, plays a crucial role in creating a truly inclusive user experience. But where do you start? How do you efficiently integrate internationalization (i18n) into your Vue.js app without overcomplicating your codebase or workflow?
In this guide, we'll walk you through every step of the process, from setting up a Vue.js project and the vue-i18n library to implementing features like lazy-loading translations and dynamically setting locales through route parameters. But we won't stop there: automation is the key to scaling localization efforts, and we'll show you how to take it a step further by using Polygot, a tool designed to simplify and streamline app translation for Vue.js projects (among many other frameworks).
Whether you're new to localization or looking to refine your approach, this guide has everything you need to build a multilingual Vue.js app that's both efficient and scalable. Let's dive in!
Using the Nuxt framework? Our Nuxt i18n guide might be more suitable for you.
Table of contents
All the code for this guide is available in this github repository. Feel free to clone it for use as a template or to save time!
Project creation
Let's start at the beginning, to start on a solid foundation: create a new Vue.js project. For this, let's use the Vue project creation command and follow the steps in the prompt.
npm create vue@latest
To simplify this tutorial, we will not use Typescript, but you are free to adapt your answers to your needs. Here is the configuration that we have chosen on our side:

Please note that we selected "Yes" to question about Vue Router. This will be necessary later in this guide if you want to follow our instructions to use route parameters to define the current locale.
Now, let's move to our project's directory, install its dependencies, and run it to check that's everything's fine so far.
cd vue-project
npm install
npm run dev
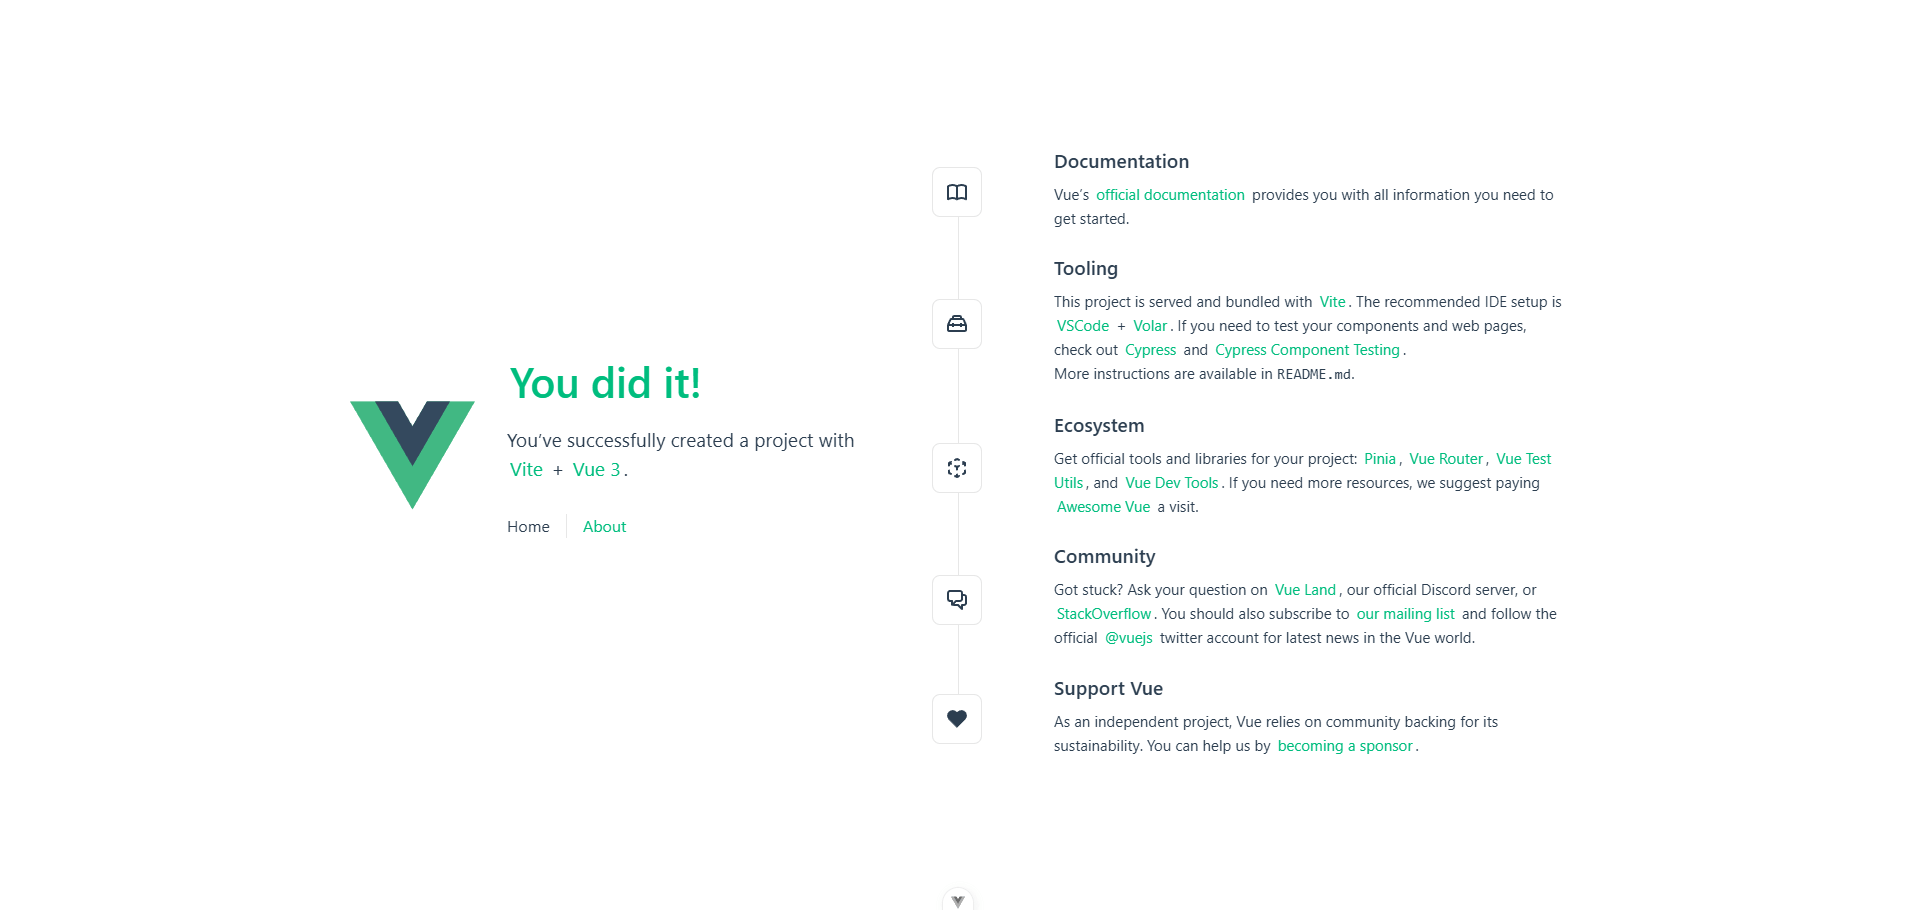
Open your browser at localhost:5173 (or whatever port you have configured): you should should be able to see our brand new Vue project!
Implementing internationalization
As explained above, internationalization (or i18n for short) means making a system compatible with several languages. In the Vue.js world, the most common library to do this is vue-i18n, which is actually a plugin. Let's go ahead and install it.
npm install vue-i18n@latest
Now that the plugin is installed, we have to create an instance of it, in order to be able to localize our app (i.e. to adapt the content of our app according to a defined language).
For this guide, I'll be using French as a second language to demonstrate how our translation system works.
import './assets/main.css'

import { createApp } from 'vue'
import { createI18n } from 'vue-i18n'

import App from './App.vue'
import router from './router'

const i18n = createI18n({
  locale: 'en',
  fallbackLocale: 'en',
  availableLocales: ['en', 'fr'],
  messages: {
    en: {
      // We will add english messages here
    },
    fr: {
      // We will add french messages here
    }
  }
})

const app = createApp(App)

app.use(router)
app.use(i18n)

app.mount('#app')
Let's recap what's happening in the code above. We've told the i18n plugin that:
- we want our default locale to be English (
locale: 'en') - when a translation is missing we want to display the English message instead (
fallbackLocale: 'en') - we are going to make our app available in English and French (
availableLocales: ['en', 'fr'])
I suggest you limit this guide to translating the content of the App.vue and HelloWord.vue components. Of course, you are free to go further on your own.
Let's copy the text content of this component and insert it into the messages object of our plugin instance that we created earlier. Let's also add the same (translated) items for French.
// ...

const i18n = createI18n({
  // ...
  messages: {
    // English messages
    en: {
      home: {
        didIt: 'You did it!',
        success: 'You\'ve successfully created a project with',
      },
      nav: {
        home: 'Home',
        about: 'About',
      }
    },
    // French messages
    fr: {
      home: {
        didIt: 'Vous l\'avez fait!',
        success: 'Vous avez créé un project avec succès avec',
      },
      nav: {
        home: 'Accueil',
        about: 'A propos',
      }
    }
  }
})

// ...
Now that our messages are defined, we can use them in our pages and components. Let's update our App.vue component to use the translated messages. This is possible thanks to the global function $t, injected by the vue-i18n plugin.
<!-- ... -->
<template>
  <header>
    <img alt="Vue logo" class="logo" src="@/assets/logo.svg" width="125" height="125" />

    <div class="wrapper">
      <HelloWorld :msg="$t('home.didIt')" />

      <nav>
        <RouterLink to="/">{{ $t('nav.home') }}</RouterLink>
        <RouterLink to="/about">{{ $t('nav.about') }}</RouterLink>
      </nav>
    </div>
  </header>

  <RouterView />
</template>
<!-- ... -->
Let's do the same for the HelloWord.vue component.
<!-- ... -->
<template>
  <div class="greetings">
    <h1 class="green">{{ msg }}</h1>
    <h3>
      {{  $t('home.success') }}
      <a href="https://vite.dev/" target="_blank" rel="noopener">Vite</a> +
      <a href="https://vuejs.org/" target="_blank" rel="noopener">Vue 3</a>.
    </h3>
  </div>
</template>
<!-- ... -->
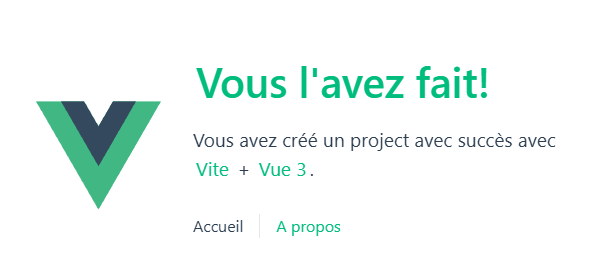
To quickly test whether everything is working properly, let's change the locale property of our plugin instance to fr to display the content in French.
// ...

const i18n = createI18n({
  locale: 'fr',
  // ...
})

// ...
And... tada! Our app is now displayed in French! That was pretty easy, wasn't it?
Adding a locale selector
Obviously, our users will not be able to change the language by modifying the file as we have just done... What they need is a locale selector. Some kind of button that allows them to choose between the different languages available on our website.
Let's build this selector, shall we? Create a new file LocaleSelector.vue under the src/components directory.
<template>
  <div>
    <select v-model="$i18n.locale">
      <option v-for="locale in $i18n.availableLocales" :key="`locale-${locale}`" :value="locale">{{ localeToText(locale) }}</option>
    </select>
  </div>
</template>

<script setup>
const localeToText = (locale) => {
  switch (locale) {
    case 'en':
      return 'English'
    case 'fr':
      return 'Français'
    default:
      throw 'Unknow language'
  }
}
</script>
What do we have here?
We just created a select button, which current value is bound to the locale property of the instance of the i18n plugin.
As options (available values), we want the list of the available locales, as listed in the src/main.js file.
To polish things up a bit and make them look better, we've created a function that displays the name of each language, rather than a language code. This function will be used to define the text for each option.
Here, it is preferable to display the names as written in their own language, rather than translating them. I personally won't be able to work out which option corresponds to ‘English' if I arrive at a Chinese site and all the options are translated into Chinese. 😅
Now let's add this new component to our interface.
<template>
  <header>
    <!-- ... -->
    <div class="wrapper">
      <!-- ... -->
      <div style="display: flex; flex-direction: column; gap: 10px;">
        <LocaleSelector />
        <!-- We will add more here later -->
      </div>
    </div>
  </header>

  <RouterView />
</template>

<script setup>
// ...
import LocaleSelector from './components/LocaleSelector.vue'
</script>
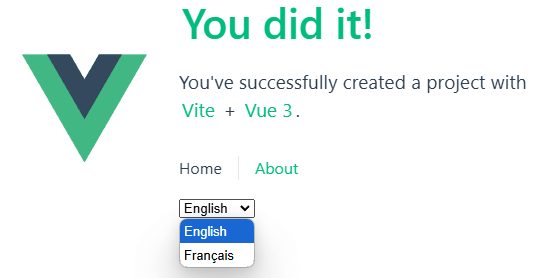
We now have a beautiful (arguably) language selector... and it works! Switching from one language to another should update the text accordingly.
Handling pluralization
We could stop there. We already have an application with a functional internationalisation system, and localisation for English and French.
But I still have a few things I think are important to mention. One of them is pluralisation, in other words how can we display content that varies according to quantity.
We won't go through all the features of vue-i18n in this guide, but pluralisation will also allow me to demonstrate an interesting point: the preservation of the state of the application.
To illustrate this, we'll use a shopping cart as an example. Let's start by adding the messages we'll need for this component.
// ...

const i18n = createI18n({
  // ...
  messages: {
    en: {
      // ...
      cart: {
        count: 'You have 0 items in your cart.|You have 1 item in your cart.|You have {count} items in your cart.',
        add: 'Add 1 item'
      }
    },
    fr: {
      // ...
      cart: {
        count: 'Vous avez 0 élément dans votre panier.|Vous avez 1 élément dans votre panier.|Vous avez {count} éléments dans votre panier.',
        add: 'Ajouter 1 élément'
      }
    }
  }
})

// ...
So we've added a message indicating the number of items currently in our cart. This has several variants (called plural forms): when we have no items, 1 item, and several items. We've also added a message for the text displayed in a button for adding 1 item to the cart.
Now let's create our shopping cart component, which will be limited to displaying the current number of items, as well as a button for adding 1 item.
<template>
  <div>
    <div>
      {{ $t('cart.count', count, { count }) }}
    </div>
    <button @click="increment">
      {{ $t('cart.add') }}
    </button>
  </div>
</template>

<script setup>
import { ref } from 'vue'

const count = ref(0)

const increment = () => {
  count.value++
}
</script>
See what we've done here? Our translation function for the cart.count message has several parameters:
- the message key, as usual
- a second parameter
count, indicating the quantity, which will enable the mechanism to select the corresponding message variant - a third parameter
{ count }, which allows us to inject content into our message: our variant for "many" in fact requires acountparameter to inject the number of items in our basket into our message
Let's add this component to our app.
<template>
  <header>
    <!-- ... -->
    <div class="wrapper">
      <!-- ... -->
      <div style="display: flex; flex-direction: column; gap: 10px;">
        <LocaleSelector />
        <Cart />
      </div>
    </div>
  </header>

  <RouterView />
</template>

<script setup>
// ...
import Cart from './components/Cart.vue'
</script>
When clicking the "Add 1 element" button, it is going to update the text according to the counter, and the appropriate plural form will be used, as expected.
The interesting thing to note here is that if we change the language when we've added a few items to the basket, the counter isn't reset to 0. The state of the application is retained, which is very practical in most cases.


Seperating messages into different files
You may have already realized this, but writing all of our messages directly in the src/main.js file is not maintainable, especially if our app grows and gets a lot of messages, in a lot of languages. This will somehow pollute this file, whose primary function is not to manage translations.
This is very easily fixable. We just need to create a JSON fishier for each locale.
{
  "home": {
    "didIt": "You did it!",
    "success": "You've successfully created a project with"
  },
  "nav": {
    "home": "Home",
    "about": "About"
  },
  "cart": {
    "count": "You have 0 items in your cart.|You have 1 item in your cart.|You have {count} items in your cart.",
    "add": "Add 1 item"
  }
}
{
  "home": {
    "didIt": "Vous l'avez fait!",
    "success": "Vous avez créé un project avec succès avec"
  },
  "nav": {
    "home": "Accueil",
    "about": "A propos"
  },
  "cart": {
    "count": "Vous avez 0 élément dans votre panier.|Vous avez 1 élément dans votre panier.|Vous avez {count} éléments dans votre panier.",
    "add": "Ajouter 1 élément"
  }
}
We then need to import these files, and to use them instead of our raw messages.
// ...

import enMessages from './locales/en.json'
import frMessages from './locales/fr.json'

const i18n = createI18n({
  locale: 'en',
  fallbackLocale: 'en',
  messages: {
    en: enMessages,
    fr: frMessages
  }
})
That's already cleaner. We can actually still improve our message loading mechanism, but we'll get to that a bit later.
Using different routes for each locale
A very cool feature, and one that is also very useful especially for SEO (Search Engine Optimization) is the ability to use different URLs (routes) depending on the language of our application.
To do this, we will need to modify the mechanism we have put in place so far a little, but nothing insurmountable, I promise you!
First, let's create a src/i18n.js file that we will use to store utility functions to manage the state of the i18n plugin instance (this will be more convinient).
import { createI18n } from 'vue-i18n'

export const AVAILABLE_LOCALES = ['en', 'fr']

export function getLocale(i18n) {
  return i18n.global.locale
}

export function setLocale(i18n, locale) {
  i18n.global.locale = locale
}

export function setupI18n(options) {
  return createI18n({...options, availableLocales: AVAILABLE_LOCALES})
}

export function setI18nLanguage(i18n, locale) {
  setLocale(i18n, locale)
  document.querySelector('html')?.setAttribute('lang', locale)
}
Let's update our main file to use this new i18n "manager".
import { setupI18n } from './i18n'

// ...

const i18n = setupI18n({
  locale: 'en',
  fallbackLocale: 'en',
  messages: {
    en: enMessages,
    fr: frMessages
  }
})
What we need to do next is updating our router to include the locale in the app's routes (note that we also add names to the routes) and to select the right locale according to the current route.
import { createRouter, createWebHistory } from 'vue-router'
import HomeView from '../views/HomeView.vue'
import { getLocale, setI18nLanguage, AVAILABLE_LOCALES } from '../i18n'

export function setupRouter(i18n) {
  const locale = getLocale(i18n)

  // create router instance
  const router = createRouter({
    history: createWebHistory(),
    routes: [
      {
        path: '/:locale',
        name: 'home', // Important!
        component: HomeView
      },
      {
        path: '/:locale/about',
        name: 'about',  // Important!
        component: () => import('../views/AboutView.vue')
      }
    ]
  })

  // Navigation guards
  router.beforeEach((to) => {
    const paramsLocale = to.params.locale

    if (!AVAILABLE_LOCALES.includes(paramsLocale)) {
      return `/${locale}`
    }

    // Set i18n language
    setI18nLanguage(i18n, paramsLocale)
  })

  return router
}
What we did here is simple: before each page load, we extract the locale parameter from the path of the requested page. We then change the current language of our i18n plugin according to the value of this parameter.
Again, we need to update our app's main file to use this new router mecanism.
import { setupRouter } from './router'

// ...

const router = setupRouter(i18n)
Let's not forget our little language switcher component! This one needs to:
- react to route changes, because these changes may involve a change of locale
- change the current path when selecting a locale
<template>
  <div>
    <!-- We can't use $i18n.locale anymore here! -->
    <select v-model="currentLocale">
      <option v-for="locale in $i18n.availableLocales" :key="`locale-${locale}`" :value="locale">{{ localeToText(locale) }}</option>
    </select>
  </div>
</template>

<script setup>
import { watch, ref } from 'vue';
import { useI18n } from 'vue-i18n';
import { useRouter } from 'vue-router';

const router = useRouter()
const i18n = useI18n()

const currentLocale = ref(i18n.locale.value)

watch(currentLocale, () => {
  if (router.currentRoute.value.name) {
    router.push({
      name: router.currentRoute.value.name,
      params: { locale: currentLocale.value }
    })
  }
})

watch(router.currentRoute, (route) => {
  currentLocale.value = route.params.locale
})

// ...
</script>
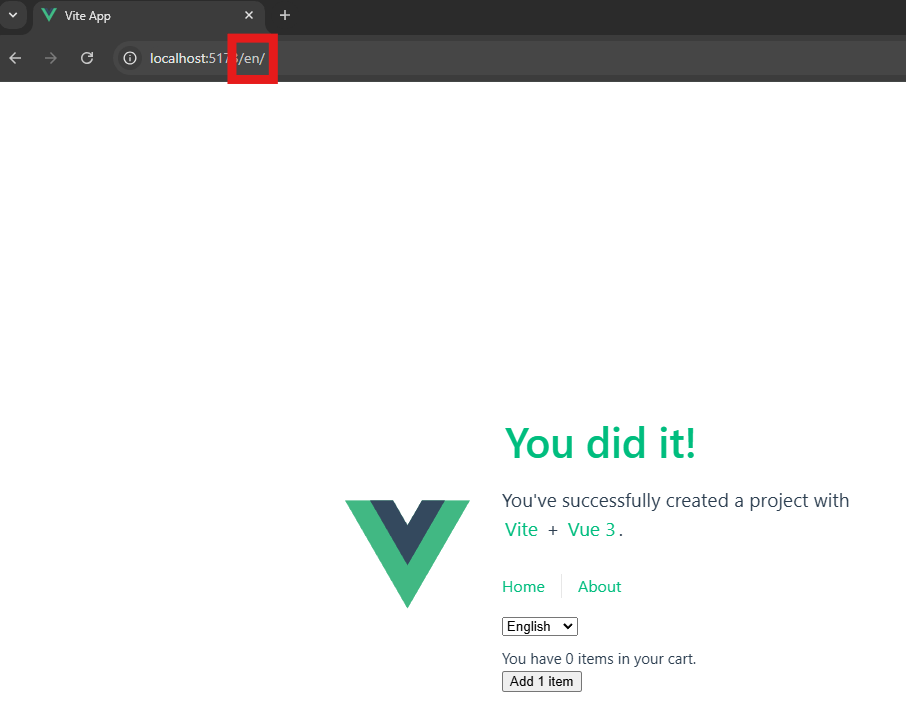
Now the app current locale appears in the URL. When you change to another language, the URL is updated, again without losing the state of the application.
But we still need to fix links, because they don't take the current locale into account. To avoid having to write too much code for each link that we will use in our application, it is better to create a dedicated component, which will manage the locales itself. Let's create a LocaleRouterLink component that we will use instead of the native RouterLink.
<template>
  <RouterLink :to="{ name: to, params: { locale: $i18n.locale } }">
    <slot/>
  </RouterLink>
</template>

<script setup>
const props = defineProps({
  to: String
})
</script>
This component is pretty straightforward. It only asks for the name of the target route. Thanks to it, our links will redirect to the given page while keeping the current locale.
Of course, we have to modify each use of RouterLink to use this component instead.
<template>
  <header>
    <!-- ... -->
    <div class="wrapper">
      <!-- ... -->
      <nav>
        <!-- We need to use names for the "to" prop -->
        <LocaleRouterLink to="home">{{ $t('nav.home') }}</LocaleRouterLink>
        <LocaleRouterLink to="about">{{ $t('nav.about') }}</LocaleRouterLink>
      </nav>
      <!-- ... -->
    </div>
  </header>

  <RouterView />
</template>

<script setup>
// ...
import LocaleRouterLink from './components/LocaleRouterLink.vue'
</script>
Our links now work correctly as they take into account the current locale to define the target route. 🎉
Lazy loading messages
Everything is working fine. Isn't it?
Yes... But we still have a problem that is not quite visible right now, but that is going to cause us problems when our app has a lot of messages, in a lot of languages: we are currently loading them all.
That is a pretty big performance issue, as a lot of data is going to be loaded and transfered to the client, for nothing. Because our users are likely only going to use our app in 1 language, we must only load the messages in this language.
This crucial step will only take us 2 minutes to implement, so let's get back to work!
We first need to update src/i18n.js to add a function that loads the messages and to update the setupI18n function.
// ...

export function setupI18n(options) {
  // Adding available languages here will have no impact has these languages will initially have no messages.
  // We still need to initialize the messages object
  return createI18n({...options, messages: {}})
}

export async function setI18nLanguage(i18n, locale) {
  // Loading messages
  await loadLocaleMessages(i18n, locale)

  setLocale(i18n, locale)
  document.querySelector('html')?.setAttribute('lang', locale)
}

export async function loadLocaleMessages(i18n, locale) {
  // Do not load again if the locale messages have already been loaded
  if (!i18n.global.availableLocales.includes(locale)) {
    const messages = (await import(`./locales/${locale}.json`)).default
    i18n.global.setLocaleMessage(locale, messages)
  }
}
What has actually changed here?
- our
setupI18nfunction no longer initializes the list of available languages, as these will now be added on request - when we modify the locale, if the messages for it are not loaded yet, we retrieve them and inject them into our i18n plugin instance
In our src/main.js file, we do not need to set the messages anymore.
const i18n = setupI18n({
  locale: 'en',
  fallbackLocale: 'en'
})
Let's quickly update our router file: our setI18nLanguage function is now asynchronous, and therefore needs to be awaited.
// ...

export function setupRouter(i18n) {
  // ...

  // Mark the handler as "async"
  router.beforeEach(async (to) => {
    const paramsLocale = to.params.locale

    if (!AVAILABLE_LOCALES.includes(paramsLocale)) {
      return { name: 'home', params: { locale }}
    }

    // set i18n language
    await setI18nLanguage(i18n, paramsLocale)
  })

  // ...
}
We then need to update the locale selector component as we can't rely on $i18n.availableLocales anymore. These locales are indeed added dynamically, so this array will not initially contain all our languages.
<template>
  <div>
    <select v-model="currentLocale">
      <option v-for="locale in availableLocales" :key="`locale-${locale}`" :value="locale">{{ localeToText(locale) }}</option>
    </select>
  </div>
</template>

<script setup>
// ...

import { AVAILABLE_LOCALES } from '@/i18n'

// ...

const availableLocales = AVAILABLE_LOCALES

// ...
One last tiny step, but a very important one: in src/main.js we need to wait for the router to be ready before displaying the initial page. Otherwise the app will be mounted while the i18n messages are not loaded.
// ...

router.isReady().then(() => {
  app.mount('#app')
})
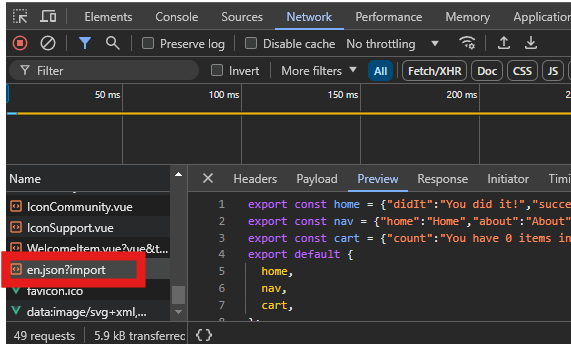
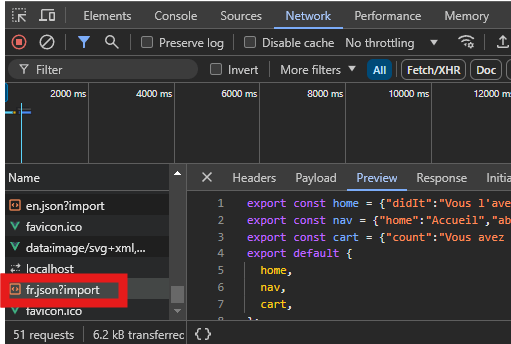
Now we can clearly see that our messages are only loaded when necessary. This will save us potentially loading dozens of large files containing all our translations.
Automating localization
We have now a fully functionning multilingual app. We can extend the localization process to all of our pages, and add any locale we want.
If you want to get a global audiance, reach users from all over the world, you should take localization seriously. And if you got this far, chances are that's the case.
However, you will quickly realise that creating an application translated into several languages is very, very, time-consuming. Every time you modify or add new features, you will have to add or modify messages accordingly, in all the languages you have set up. This is known as continuous localization.
There are several options available to you:
- ❌ Generate translations yourself, manually. As I just told you, here at Polygot we doubt that this is the right choice. You won't be able to maintain many languages, on an application with a lot of content.
- ❌ Use the services of a translation agency. Delegating is a first step. But it costs money (a lot), and it will slow down your growth, because you will be constantly waiting for translations done by your partners.
- ✅ Automate translation generation using a specific tool: This seems like the smartest choice. No manual work, translations generated in seconds, scalable to as many languages as you want...
So let's quickly set up an automated localization system with Polygot. You'll see, 5 minutes of setup time will save you hours of work each time you modify your application.
Just follow these simple steps:
- Create a Polygot account
- Install the CLI
npm install -g @polygothq/cli - Create a new Polygot project, with some new target languages (let's add Italian and Spanish for instance)
- In our app root directory, initialize the Polygot project. Set
src/locales/en.jsonas the source file, andsrc/locales/%lang%.%ext%as translations target patternpolygot init - Push our existing messages
polygot push sources polygot push translations -l fr - Synchronize to generate and pull the new translations
polygot synchronize - Add the missing target languages in
src/i18n.js\\ ... export const AVAILABLE_LOCALES = ['en', 'fr', 'it', 'es'] \\ ... - Update the
LocaleSelectorcomponent to add the new locales names<!-- ... --> <script setup> const localeToText = (locale) => { switch (locale) { case 'it': return 'Italiano' case 'es': return 'Español' // ... } } </script>
And here we are! We generated locale files for all the target languages. We now are able to develop our app worrying only about English, and generate target locales automatically when wanted.
Learn more about Polygot's features on its documentation website.
Conclusion
Localization is no longer an optional feature; it's a vital step in building apps that connect with global audiences. With this guide, you've learned how to use vue-i18n to localize your Vue.js app, optimize performance with lazy loading, and enhance SEO with route-based locales. Most importantly, you've seen how automation tools like Polygot can revolutionize your localization workflow, saving you time and effort while ensuring scalability.
Localization can seem daunting, but with the right tools and strategies, it becomes an integral, manageable part of your development process. Start crafting apps that speak your users' language—literally and figuratively.


